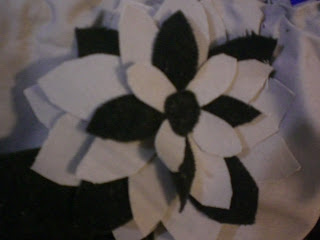
In order to make this fabric flower you need at least long strip of fabric, several inches wide. I used two colors, a gray cotton and black corduroy, but you can use whatever you'd like.
You are going to cute squares out of your fabric in varying sizes. My squares ranged from 6 to 3 inches, I cut seven total squares.
Here is a really easy way to cut semi-even squares without having to measure, mark and cut. Grab hold of one corner of your fabric strip and identify approximately how tall you want your square to be. Now make one cut into your fabric at that point. Take your first corner and fold it into your strip so that it forms a triangle. You want to line up your existing edge (the side) with the cut you just made. Press your fold down and hold it with your thumb/finger and cut along your triangle shape that was formed by your first corner. Open it up and now you have a square. I hope that makes sense, it is a lot harder to explain it in writing than it would be to show you.

Now that you have your squares you need to cut out some flower shapes. Take one fabric square and fold it so that you have a rectangle. You are going to make two curved cuts, one on either the left and right. You can trace a small round object with a flat bottom if you want your curves to match (I usually just eyeball it, after all flowers aren't perfect, right?). Here I used a spool of thread and a piece of chalk to mark the curve on my black fabric. Notice that my fold is at the bottom and the curve goes out to either of the top points. YOU WANT TO BE SURE TO LEAVE SOME OF YOUR FOLD INTACT, DO NOT CUT ALL THE WAY THROUGH! This is important for your flower to stay together.

Open up your fabric after your first set of cuts. You should have a bow tie type shape. Notice the center is the portion of the fold that you left intact.

Fold the "bow tie" in half with the curves on top/center. Your fold should again be at the bottom between your fingers.

Repeat your previous curve traces and cut along those lines. You can round the tips of the curves at this point if you'd like, I left mine. I liked the slightly pointed ends.

Once you unfold it, you will have a general four petal flower shape. Repeat this with each of your squares.

Starting with the largest working to the smallest flower piece, lay them one on top of the other. Arranging them so that they create a full flower, you don't want pieces laying directly on top of each other blocking the one behind. I cut a small circle out of the black fabric and used that as my middle, you can use anything you'd like though. I put a few stitches through the flower to hold it together and then stitched the finished flower on my new tote bag (for the upcoming plane ride to FL, yipee!). Sorry for the blurry pics
Sneak peek at my new bag! Love it! I'll try to post it soon


so pretty, I tried to make small flowers like that with felt and sew on a headband, but I couldn´t cut as small as I wanted. Lovely tutorial.
ReplyDeletewww.caprichosdeana.blogspot.com
Try using a small pair of scissors with sharp blades, maybe cut each petal individually. It can be hard if you want them really small. Have you tried the yoyo technique?
ReplyDelete