Sunday, August 8, 2010
Forgetful
I have a bad habit of forgetting to take pictures until it is too late. Oh well. I had the pleasure of making a nursing cape for another super mom! Even better, I got to take it to her and hold her new sweet baby! Here is the fabric she picked out. I love it! But then again, I think I always say that. I guess I wouldn't buy fabric if I didn't love it.

Tuesday, August 3, 2010
Tutorial: To Infinity And Beyond Bubble Tunic
Ok, I couldn't wait, so here it is! A super cute refashion with lots of potential. I always see lots of cute t-shirts on clearance (boys and girls styles, haha) and this is a simple way to give them a little shape and girlishness.


You can easily change the sizes to make a dress/tunic/shirt style, but I will tell you what I used. My daughter wears between a 2/3T so what I used was a boy's 3T t-shirt for the body of the tunic. The bubble hem needs to be smaller than the body of the shirt, so I used a 2T tank/shirt for the hem and the sleeves. The small shirt (or knit) needs to have a LOT of stretch.

I wanted to get as much length out of my t-shirt as I could, so I took out the bottom hem. Otherwise just cut off both hems, like I did with the tank top.

Decide how wide you want your bubble hem to be, double that number and add about an inch for seam allowance. Then measure and cut your second shirt that you have a tube.

Fold your tube of fabric in half, with the wrong sides facing. Pin at the side seams so that the ends of the fabric meet. Then fold in half the other way and pin it there so that you have pins dividing the hem into quarters. Now do the same to the bottom of the body of your shirt. Do you see how much smaller my hem is than my shirt?

Now pin your shirt and hem, right sides together (and cut ends of both fabrics meeting), at the quarters. You should expect to have extra fabric bunched because they are not the same size.

Now it is time to sew them together! You can use a zigzag stitch, but I just discovered another stitch that I have been really have with so far. It looks like a really small zigzag stitch, but then after a few stitches it does one really big zigzag. I'm really pleased with how well it stretches after it was sewn, far more than the experience I've had with a regular zigzag stitch. As you start sewing, be sure to back stitch so secure it and then as you sew gently stretch the bubble hem so that it matches the length of the shirt. Once you get to the next set of pins, make sure your needle is down and then continue stretching up to the following set of pins.

TADA! You now have a bubble hem!
I used the tutorial here for the sleeves of the dress. For the first blue t-shirt I used the hem I cut from the patterned tank top (just cut it in half). It didn't have as much stretch as I would have liked, I think I'll actually redo that one.

For the second one I cut strips from the purple shirt I used. The other change I made was to trim the "shoulder" of the shirt. I lined up my ruler and cut about an inch off just the top so that it would look less like a boy's "muscle" t-shirt.


I am much happier with how this one turned out. I think I'll end up doing the necklines the same way.

As my daughter would say, "tee ree YON!" (translated, To Infinity And Beyond!)!

I hope you enjoy and make lots of cute, unique bubble tunics for your little ones to enjoy!
Linking up here
To Infinity And Beyond! Bubble Tunic
I had a problem. My daughter LOVES Toy Story, it is really the first thing she has ever gotten excited about. I really wanted to get her some Toy Story apparel, but I'd estimate that about 90% of the Toy Story anything is very obviously for boys. Sigh. Of the (very) few girl's t-shirts I have seen have been pink (sorry, but not my fav) and had the cowgirl, Jessie, on them. Of course my daughter is in love with Buzz!
Solution. Stumbling across several boy's Toy Story t-shirts on clearance. And by stumbling of course I mean, stalk for weeks until they are cheap enough for me to consider buying. haha I bought several and wanted to try several different techniques with them.
Here are the first two. I am calling this the To Infinity And Beyond! Bubble Tunic (a tutorial is on the horizon). It was a little too short to be a dress, and a little too long to be a shirt so...tunic it is!
To Infinity And Beyond!


It was so simple that I made another one.


I actually like this one better, I think I'll redo the sleeves on the blue one and then probably do the same thing to both necklines. I think that will make it a little more girlie too.
So what do you think? My daughter loves it, and that makes me happy!
My computer caught another, eh, cold so I'm trying to catch up with pictures and such. Once I do that I will have a tutorial for the Bubble Tunic, so stay tuned!

Saturday, July 31, 2010
craft fail...almost (label making)
Yep, I have those moments. I had seen a post by Hilda (she has been so sweet) at handmade therapy for making your own labels. It was one of those hand slapping the forehead things, so simple yet so GENIUS! I've been dragging my feet at starting my etsy shop, and one of the reasons was not having a way to label my products. I thought this would be an awesome solution. I remembered ordering a rubber stamp from VistaPrint back when I got my address labels and business cards (btw, you can often score free products there, although I think their shipping is a little high). The only trouble was that it was one of those self inking stamps, hmm. I brought it up to my hubby and before I even knew it, he was pulling that little sucker apart and "rescued" the rubber stamp part! Wahoo! That meant I didn't have to spend the extra time/money for a new one. My hubby was even more sweet and genius by sticking the stamp back into the handle portion of the stamp, wedging it with shims of all things and securing it with a little glue. I love how handy my man is!
Here is where I get to my "fail". The only matte ribbon I could find at Joann's was grosgrain ribbon. Then, I used WAY too much paint so that my felt was kind of soggy and I just couldn't get the right amount on my stamp. I was afraid that the lettering on my stamp was just too small and I would have to get another one. )= This is how they turned out.*sigh* blurry, patchy...just unusable

I was discouraged, so I went back and read Hilda's post as well as the comments. She mentioned in a comment that she used Bobbin Ribbon from Micheal's (in the scrapbooking section, seen here). They came in pretty small spools, so I picked up both a cream and a white, they were only $.99 each (less if you use a coupon).
Here is a tip for you, I had used a LOT of paint the first time around and didn't want to waste it. My hubby and I have done a lot of painting in our home and he regularly wraps paint brushes/cans/trays in foil to cut off the air and keep the paint from hardening. I used some Glad press 'n seal and stuck my paint in the fridge, several days later it was still usable!
Anyway, back to the crafting. This time I put a second piece of felt over my already saturated piece and tentatively started stamping. This time it WORKED!!! I am so excited to have labels for my products now! I feel like I am one step closer.

Can you see how he used the shims to secure the stamp?

Wahoo! I stitched the labels on my first set of products last night (a super cute matching nursing cape and change n' go)!

Thursday, July 29, 2010
some great craft tips
Check out these great craft tips over at Kari's blog, U-Create.
Oh, and this little show called Project Runway is back on TONIGHT! Wahoo!
Oh, and this little show called Project Runway is back on TONIGHT! Wahoo!
Monday, July 26, 2010
flower power
Wahoo! Another fun project for a friend. Flowers out of felt and fabric scraps. She sent me some pictures for inspiration and here is what I came up with. I think she is using them for scrapbooking, but I think may make some extras for my front door wreath (because she let me keep the extras, yay!). I think they would also be super cute to wear, on a headband, clip, purse or even a funky necklace.
Here is what I came up with.


It was pretty simple, cutting out and layering flower shapes, sewing down with contrasting thread. The possibilities are endless!
linking up here:

Here is what I came up with.


It was pretty simple, cutting out and layering flower shapes, sewing down with contrasting thread. The possibilities are endless!
linking up here:
Saturday, July 24, 2010
order up
Lately I have been up to my eyeballs in orders and sewing projects for friends. A nice stretch of my creativity. First up, curtain panels out of a flat bed sheet. Flat sheets are actually great to use as curtains. You can find some cute prints, usually cheaper than you could buy that yardage at a fabric store. In my case, I turned one flat sheet into 4 panels, but it could easily be a no sew project if you use the top/wide hem at the top as the rod panel.
These are going to look so cute in a little girl's bedroom (they certainly go nicely with my daughter's pale purple walls).

This mama just had a new baby, she had ordered this nursing cape, so I wanted to make something that went with it. I made a couple of burp cloths, similar to these, but I drafted my own pattern (bigger!) and added a panel of matching fabric on the flannel side. So soft and cozy.

Fun stuff!
Thursday, July 22, 2010
Change N Go, an awesome new diaper clutch!
Whew, I've been promising this unveil for a while, hope it is worth the wait. My problem once again is picturing taking and editing, sigh. This was the other part of my baby shower gift package.
Nursing cape


peek-a-boo baby!

Ok, now it is time for a flash back. Do you remember this that I made last Christmas? She had asked me about making a different closure, so this is what I came up with. A velcroed strap, with a little elastic to allow it to stretch to fit more diapers. I wanted to keep the softness of the ribbon, so I stitched some pleated ribbon on the closure. I swear she is my product tester for everything!

Now check out this set! Wouldn't you love a matching pair in your diaper bag? This is Sunshine Baby's nursing cape (right), and soon to be listed, change n go diaper clutch (left, front)!

I'm SO excited about this! Do you think people would guess this is to change a dirty bum?

Unfold and lay it out to change baby, the pockets are currently holding a pack of 40 wipes and 3 size 4 Huggies diapers. You'll never walk away without your changing pad again!

Tada! I have one more to "practice" on before listing them.
Wednesday, July 14, 2010
baby gifts
Did you know that Joann's sells those packs of white Gerber onesies (don't forget your coupons)? Talk about blank slate to let inspiration roll! I may have mentioned that my brother and his wife are having a little girl. Their baby shower (sadly STATES, many miles, away) was last night and these were part of the gift package that I sent.
I had SO MUCH FUN with these!

For this one I bought a pack of paper doilies from the Dollar Store (I have TONS left over), cut it into different size pieces, laid them on the onesie and then used fabric paint over the doily. I thought the pattern looked very nautical, almost like rope. I tie some little bows in matching blue grosgrain ribbon and hand stitched one at the neck and then several on the bum (LOVE it!). I also had some white cord and used the same ribbon to make a little headband.


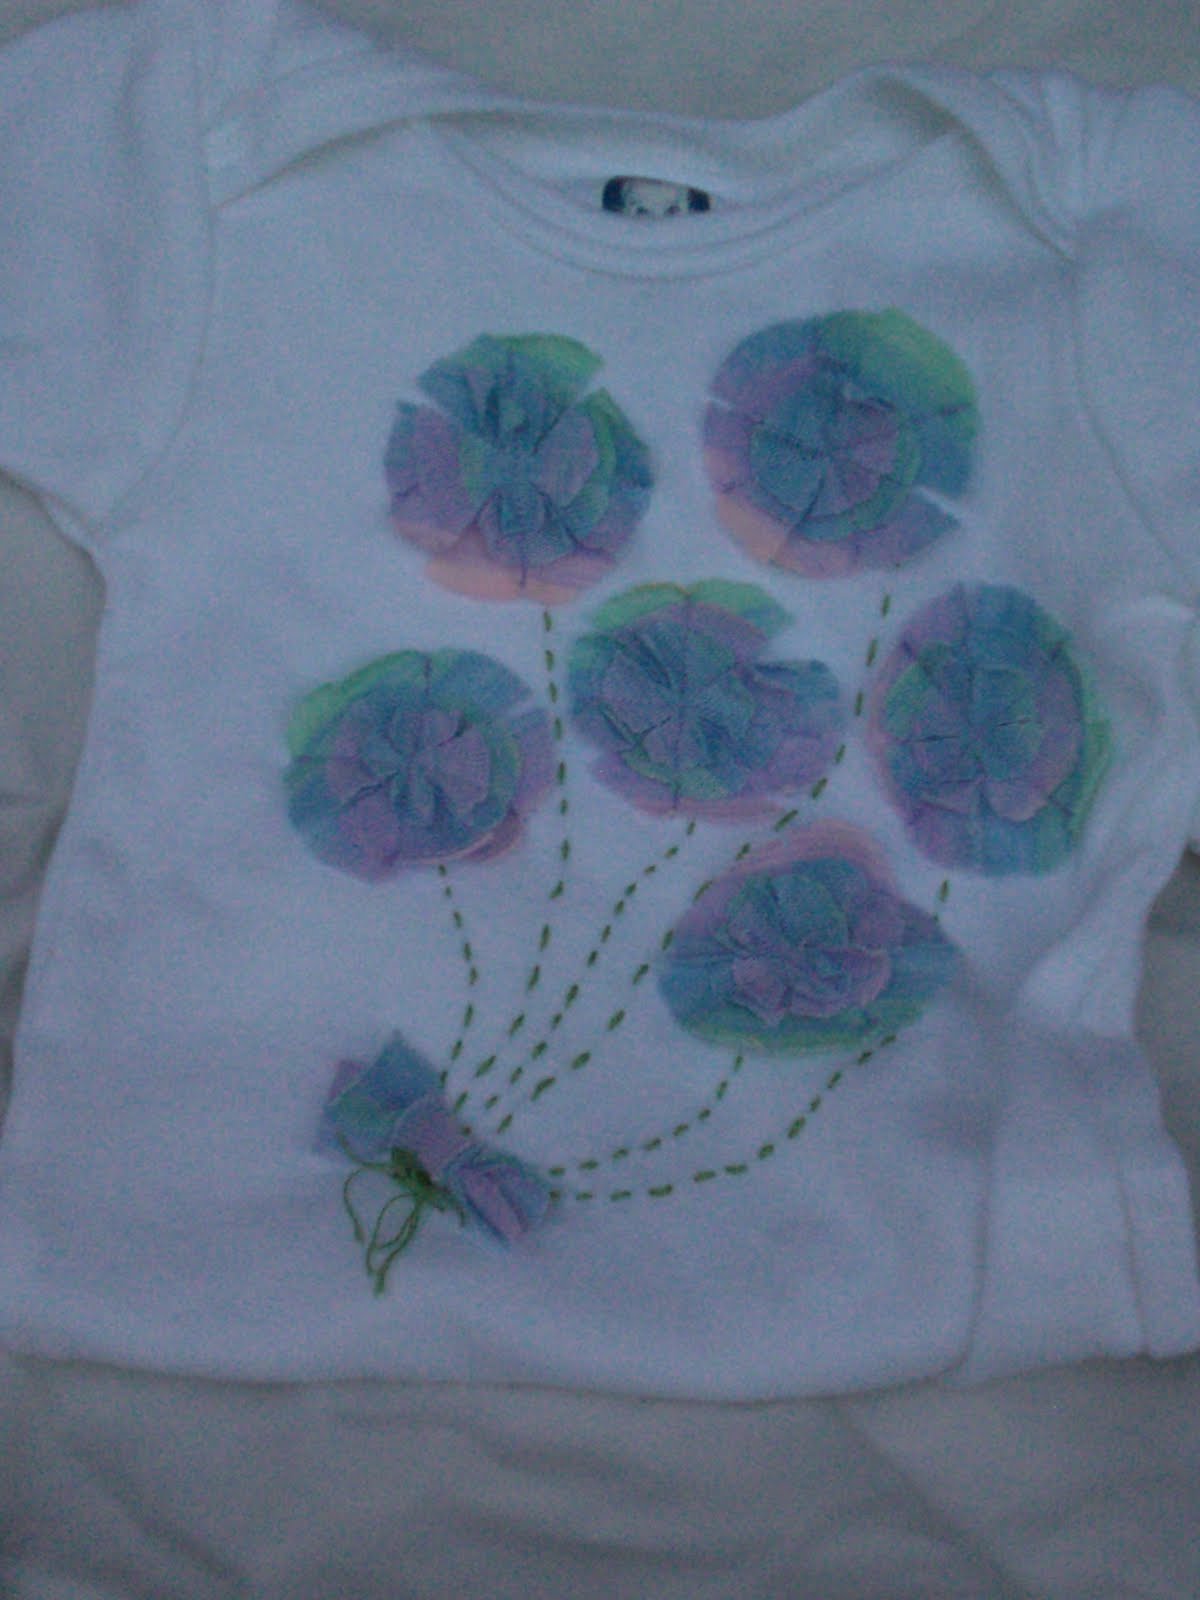
This one has been in my head ever since I did this tutorial. I'm SO glad I finally had an excuse to do this! I used this crazy rainbow printed knit and just cut out the colors I liked, but it left some fun shading. Then I tried my hand at a little embroidery flossing. I didn't get a picture of the little clip I did for this one because I literally was blowing the glue dry as I was wrapping the packages. lol

I found a little iron on initial (the baby's name starts with "O") for this one. By way, my new favorite way to initially attach an applique is with spray adhesive, thank you Adventures in Dressmaking! The headband has a bunch of different sized hearts layered on top of each other.

Another blue one for you! My friends tease me, but I LOVE putting girls in colors you don't expect. I took a lot of tips from this tutorial for the "necklace" and then some tulle and ribbon for the flower. I made a larger version of the same flower for the little clip. Once again, I LOVE adding something fun on the bum!


Here is a little tip, if you have lots of cute baby clips but your sweet baby is a baldy (like mine was), just attach the clips to a plain headband!
linking up here:
I had SO MUCH FUN with these!

For this one I bought a pack of paper doilies from the Dollar Store (I have TONS left over), cut it into different size pieces, laid them on the onesie and then used fabric paint over the doily. I thought the pattern looked very nautical, almost like rope. I tie some little bows in matching blue grosgrain ribbon and hand stitched one at the neck and then several on the bum (LOVE it!). I also had some white cord and used the same ribbon to make a little headband.


This one has been in my head ever since I did this tutorial. I'm SO glad I finally had an excuse to do this! I used this crazy rainbow printed knit and just cut out the colors I liked, but it left some fun shading. Then I tried my hand at a little embroidery flossing. I didn't get a picture of the little clip I did for this one because I literally was blowing the glue dry as I was wrapping the packages. lol
I found a little iron on initial (the baby's name starts with "O") for this one. By way, my new favorite way to initially attach an applique is with spray adhesive, thank you Adventures in Dressmaking! The headband has a bunch of different sized hearts layered on top of each other.

Another blue one for you! My friends tease me, but I LOVE putting girls in colors you don't expect. I took a lot of tips from this tutorial for the "necklace" and then some tulle and ribbon for the flower. I made a larger version of the same flower for the little clip. Once again, I LOVE adding something fun on the bum!


Here is a little tip, if you have lots of cute baby clips but your sweet baby is a baldy (like mine was), just attach the clips to a plain headband!
linking up here:
Subscribe to:
Posts (Atom)