A cute new summer tank for my very own toddler. The plain tank was $0.97 last summer at Old Navy, add a $1 iron on transfer from AC Moore and the ruffle from my fabric stash. $2 of awesomeness.
Tuesday, June 1, 2010
*Warning*
Anybody else have one of these to watch out for? lol


A cute new summer tank for my very own toddler. The plain tank was $0.97 last summer at Old Navy, add a $1 iron on transfer from AC Moore and the ruffle from my fabric stash. $2 of awesomeness.
Sunday, May 30, 2010
I'm in the spotlight!
On Jessica's blog, Happy Together! Remember the bracelets I made using her hoop earrings tutorial?

She featured them along with several other projects readers have made using her tutorials. Go check out her blog!

Friday, May 28, 2010
ugly...
Have you ever been to Lil Blue Boo blog? She is all about upcycling (reusing/recycling clothing) and creates the CUTEST clothing for little girls, combining old and new knits. She issued a challenge to use ugly knits to create something, anything (doesn't have to be clothing, or even sewn for that matter) cute. Check out the button below for contest rules and PRIZES! I hope to enter this one.


Tuesday, May 25, 2010
awkward posing
Ugh, I really hate posing for pictures but it was about time I had a picture of one of my nursing capes on a real person. I made this nursing cape for for a mama expecting a baby boy soon. I just love this fabric.

Holding my imaginary baby

Not sure why I am grabbing my thigh here...

I'm considering finally starting up an etsy site. What do you think?
Holding my imaginary baby
Not sure why I am grabbing my thigh here...
I'm considering finally starting up an etsy site. What do you think?
Monday, May 24, 2010
Fabric Wrapped Bracelets and a mini tute
Here I go again in my quest to accessorize and vamp up my wardrobe. I saw this tutorial for hoop earrings at Happy Together. They are SO cute! Unfortunately, I cannot wear "fake" earrings. Boo. HOWEVER, I figured I'd try the idea with bracelets. I had a few dollars left on an A.C. Moore gift card so I picked up this pack of thin bangles for $2 (cheaper if you have one of their coupons), I think there were 7 in the pack.
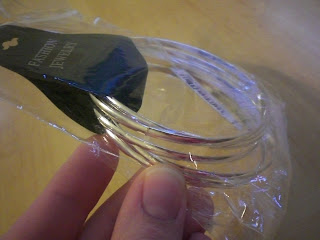
Once of these days I'll hit up the Dollar Tree and see if they have some wide bangles to try this with. I dug through my bag of scraps and decided to do several in neutral tones, I included one that had a pale blue/gray in the pattern. All colors often found in my wardrobe. I LOVE how they came out!!!

With this set, I simply wrapped the blue/brown fabric, and with the solid fabric I first wrapped, and then used her knotting technique. I think this one may be my favorite!


With this set I wrapped using a strip of the the print fabric, and the other I used the "ragged" selvage edge the solid color fabric. I love the different textures!


I used the same size bangle for this bracelet. Want to know how I changed the width of this one and created the pleats?


Here is a mini tute for you. I hope these pictures don't make your eyes bleed. I thought of taking pictures while I was in the middle of this project, which I did during the finale of LOST. I couldn't tell if they were coming out or not and I was a little preoccupied. lol
First I cut several long strips of canvas type fabric (anything on the heavier side should do) that were 1/2 inch wide. Using hot glue, I covered the INSIDE of the bracelet with my fabric strip. Then I took another strip to create the pleats on the outside of the bracelet. Pinch your fabric and fold it up over the strip that is already glued down. When you have it were you want it, put a small dab of hot glue under that fold so that it stays put and then continue all the way around until your reached the spot you started. I varied the size of my pleats and let a few tilt to one side or the other so it didn't look too uniform.


Let me know if you have questions. Now wear your one of a kind bracelets with pride!


Linking up here


Once of these days I'll hit up the Dollar Tree and see if they have some wide bangles to try this with. I dug through my bag of scraps and decided to do several in neutral tones, I included one that had a pale blue/gray in the pattern. All colors often found in my wardrobe. I LOVE how they came out!!!
With this set, I simply wrapped the blue/brown fabric, and with the solid fabric I first wrapped, and then used her knotting technique. I think this one may be my favorite!
With this set I wrapped using a strip of the the print fabric, and the other I used the "ragged" selvage edge the solid color fabric. I love the different textures!
I used the same size bangle for this bracelet. Want to know how I changed the width of this one and created the pleats?
Here is a mini tute for you. I hope these pictures don't make your eyes bleed. I thought of taking pictures while I was in the middle of this project, which I did during the finale of LOST. I couldn't tell if they were coming out or not and I was a little preoccupied. lol
First I cut several long strips of canvas type fabric (anything on the heavier side should do) that were 1/2 inch wide. Using hot glue, I covered the INSIDE of the bracelet with my fabric strip. Then I took another strip to create the pleats on the outside of the bracelet. Pinch your fabric and fold it up over the strip that is already glued down. When you have it were you want it, put a small dab of hot glue under that fold so that it stays put and then continue all the way around until your reached the spot you started. I varied the size of my pleats and let a few tilt to one side or the other so it didn't look too uniform.
Let me know if you have questions. Now wear your one of a kind bracelets with pride!
Linking up here


Saturday, May 22, 2010
free
I've scored a couple of free items at Target recently. Did you know that the Target website has printable coupons? Head down to the bottom, and under "Stores" click on "coupons". Lately they've had a bunch of Merona coupons.
They actually paid me to take these off their hands, lol. I had a $5 off purse coupon, and found this $5 purse. Then I had a $3 off sandals coupon, and these sandals were $2.48. They still credited me the full $3, so they paid me! Love it!

For those who use coupons, I joined two groups on facebook that alert me when there are new printable coupons and when to match them with sales. They are The Krazy Coupon Lady and The Frugal Girls. I find it saves me a lot of time, I don't have to constantly be checking for new coupons myself, I just wait for them to tell me.
Have you seen any of Target's Liberty of London line? I think some of it is really cute. The clothes seem to be marked down 75%, yes I managed to restrain myself until then. I got these two halter dresses, LOVE the print on them, that several sizes too big but that just means more to work with! The striped skirt I got at old Navy for $2.
They actually paid me to take these off their hands, lol. I had a $5 off purse coupon, and found this $5 purse. Then I had a $3 off sandals coupon, and these sandals were $2.48. They still credited me the full $3, so they paid me! Love it!
For those who use coupons, I joined two groups on facebook that alert me when there are new printable coupons and when to match them with sales. They are The Krazy Coupon Lady and The Frugal Girls. I find it saves me a lot of time, I don't have to constantly be checking for new coupons myself, I just wait for them to tell me.
Have you seen any of Target's Liberty of London line? I think some of it is really cute. The clothes seem to be marked down 75%, yes I managed to restrain myself until then. I got these two halter dresses, LOVE the print on them, that several sizes too big but that just means more to work with! The striped skirt I got at old Navy for $2.
Thursday, May 20, 2010
have you given up on me yet?
Well, my new (month old) netbook has a virus and we've had cool, rainy weather for the last week. The combination of those two things has made it hard to get any good pictures or get them uploaded. I actually have two tutorials to post, but I haven't been able to take and upload pictures of the final product. Grr.
Finally, today we had some gorgeous weather, so I took my daughter to the park and got a few pictures of my latest refashion. My netbook is still "sick", so I'm using my old laptop that is on its last leg.
I found this shirt on clearance at Target ($2.50 if I remember correctly) and then used the remnant of one of my hubby's old t-shirts that I'd already cut up for another project. Here was the before

I used the gray t-shirt to ruffle a bunch of 1 1/2" wide strips. I sewed one row of ruffles all the way around the shirt where I wanted my neckline to be, then I added another row on the front, under the first row. It wasn't quite what I had pictured, so I added another smaller ruffle in the middle above my ruffles, and then added one more up the one side of my neckline (the opposite side of the print on the bottom to create a little balance). Once I was done I trimmed the shirt away from above the ruffles.
I'm really happy with how it turned out! The other thing I would have changed would be to make the neckline a little less wide. The ruffles are kind of heavy and can pull the shirt a bit. What do you think?


I love it! I don't think my daughter appreciates my fashion sense though. I told her it was time to go to the park this morning, and instead of running to the door like she usually does, she ran to my closet. She pointed and said, "please", and then tried to pull one of my shirts off the hanger. Hmm, thanks kid.
Linked up on


Finally, today we had some gorgeous weather, so I took my daughter to the park and got a few pictures of my latest refashion. My netbook is still "sick", so I'm using my old laptop that is on its last leg.
I found this shirt on clearance at Target ($2.50 if I remember correctly) and then used the remnant of one of my hubby's old t-shirts that I'd already cut up for another project. Here was the before
I used the gray t-shirt to ruffle a bunch of 1 1/2" wide strips. I sewed one row of ruffles all the way around the shirt where I wanted my neckline to be, then I added another row on the front, under the first row. It wasn't quite what I had pictured, so I added another smaller ruffle in the middle above my ruffles, and then added one more up the one side of my neckline (the opposite side of the print on the bottom to create a little balance). Once I was done I trimmed the shirt away from above the ruffles.
I'm really happy with how it turned out! The other thing I would have changed would be to make the neckline a little less wide. The ruffles are kind of heavy and can pull the shirt a bit. What do you think?
I love it! I don't think my daughter appreciates my fashion sense though. I told her it was time to go to the park this morning, and instead of running to the door like she usually does, she ran to my closet. She pointed and said, "please", and then tried to pull one of my shirts off the hanger. Hmm, thanks kid.
Linked up on


Subscribe to:
Posts (Atom)